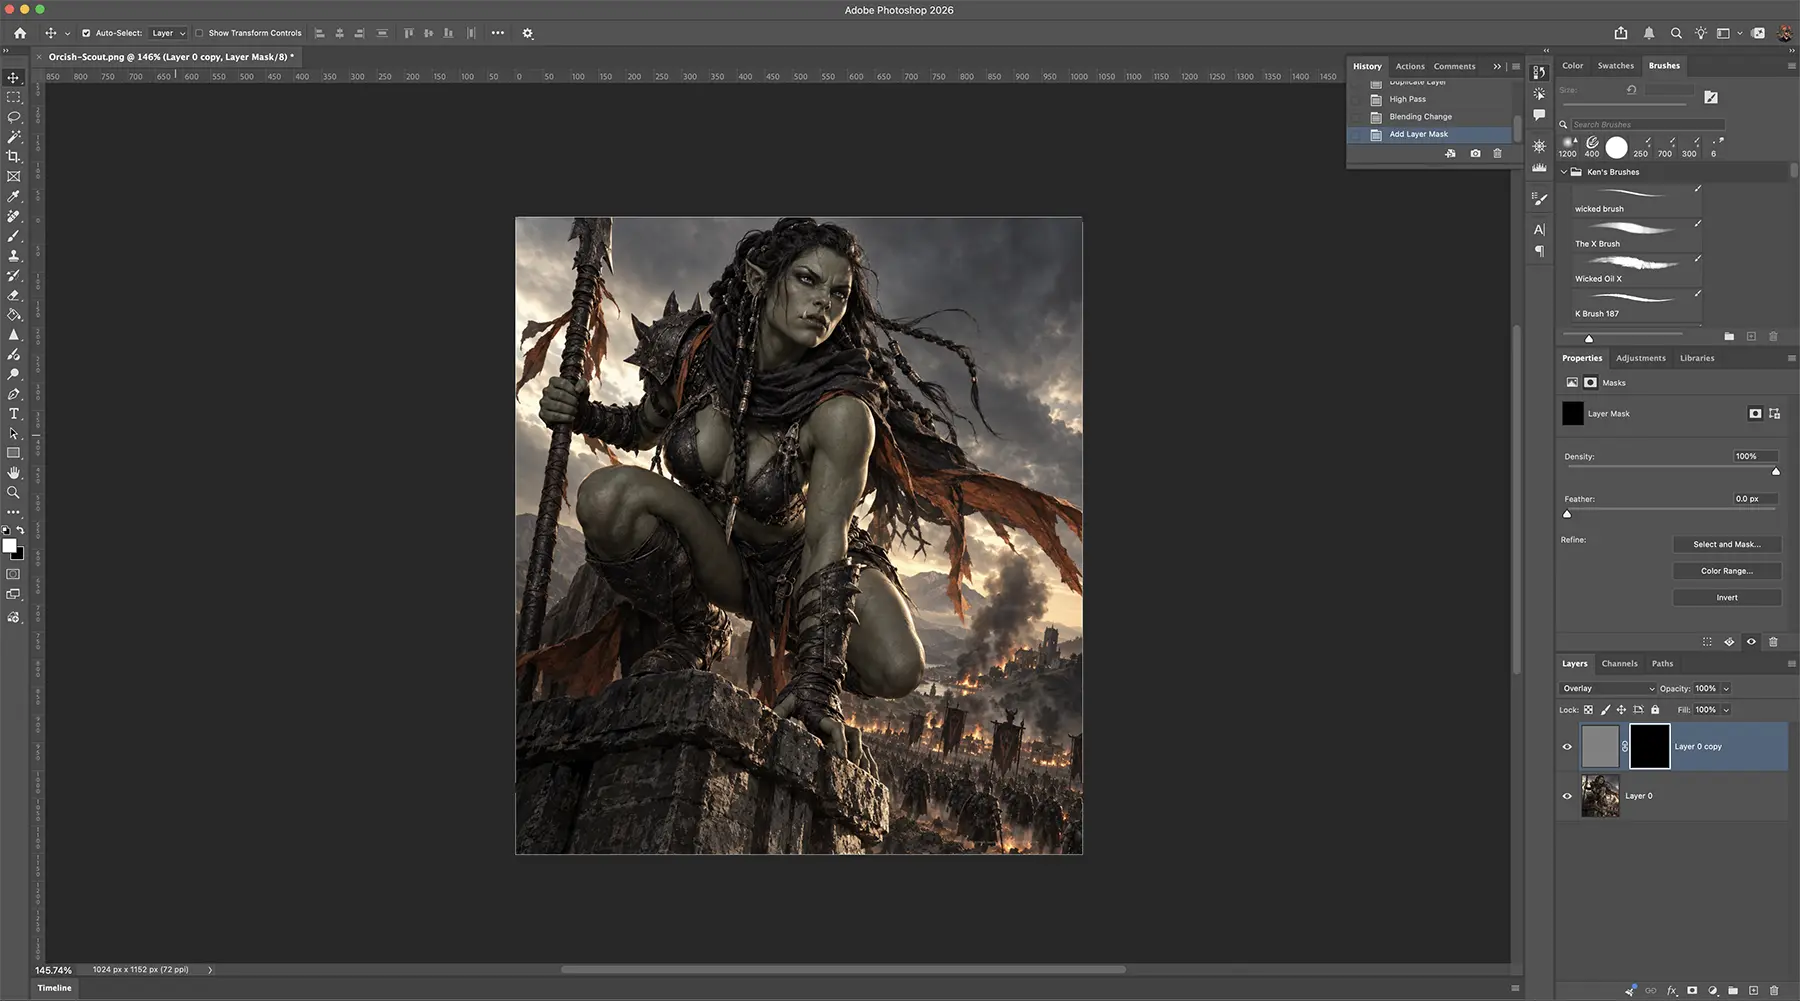
Hey all! Same as my last tip, start with your image and click the lock to the right to unlock it. Now it's a layer. Drag it over the + box at the bottom, next to the trash can. This duplicates it.
Ok, now you have two of the same image. Click on the top layer and go to Filter / Other / High Pass. You will get a version of your image that is gray, and you can see the lines. You don't want too much because it will bring in color too, and you don't want that. So adjust the slider until you can barely see the image, but you can still see the lines. Then you're good!
Ok, now change the blend mode from Normal to Overlay, and you will see that if you click visibility on and off, it's sharpening the piece!
Now, I like to layer mask it out by Ctrl-clicking the layer mask icon down where the trash can and new layer buttons are.
Now choose a soft brush with opacity around 34% and paint in the sharpening where you want it!!
Hope you like this one!
Wicked